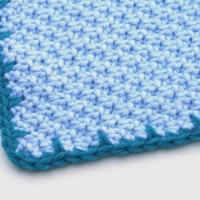
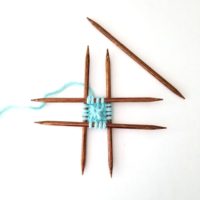
Instructions for working this stitch:
Cast-on an even number of stitches.
Row 1: *K2tog tbl, dropping only the first stitch off your needle,* rep from * to last st, ktbl.
Row 2: *P2tog, dropping only the first stitch off your needle,* rep from * to last st, p.
Repeat these rows to desired length, then bind-off while working a right-side row, pulling one stitch over the other every time you have two stitches on the right needle.
In the video, I mention a pattern available from Purl Soho which gives you a pattern for working this stitch in-the-round. You can find that pattern here.
Information on things you’ll see in this video:
In the video, I refer to yarn weights and needle sizes in US terms. A yarn weight conversion chart can be found here.
A needle conversion chart can be found here.
The poncho on the mannequin is the Easy Folded Poncho, knit in Knit Picks City Tweed DK.
My “Embrace the Swatch” water bottle can be found here.
The bulky yarn I used for demonstration is Lion Brand Hometown USA. I demonstrated using size 13 US (9mm) needles.
The yarn used in the gray swatch is Malabrigo Chunky, and I used size 10.5 US (6.5mm) needles.
The worsted-weight yarn I used in the darker green sample is Cascade 220.
The needles I used are bamboo, made by Clover.


I am interested in the pattern for a cowl in this stitch. You mentioned that Purlbee from Purl Soho had the pattern. I was unable to find it on their sites. Any ideas?
I love all your videos. They are the absolute best information and clearly spelled out. Thanks so much.
Marilyn – the link for the cowl is in the text of this webpage, where you commented! Here is the link again:
http://www.purlbee.com/the-purl-bee/2011/1/5/whits-knits-big-herringbone-cowl.html
S t a c i
I’m nearly finished with the Big Herringbone Cowl from Purl Soho, and I wanted to chime in and say that there are a few things I learned along the way (most from the forums on Ravelry) that might help those that want to try it.
– This pattern has a “traveling seam.” I tried to account for it and adjust, but it seemed to make things worse… just embrace it instead 🙂
– Use lifelines. Use lifelines. Use lifelines. I found it very difficult to correct mistakes, and after having to frog the entire thing once, I learned my lesson.
– I’m a tight knitter, and using two size 17 needles made it REALLY difficult to get the right needle into the loop on the left needle… so, I switched out the left needle for a size 13. The loops hold their shape around the cord, and it’s so much easier to insert the 17 into the loose loops on the 13.
– Tension is very important.
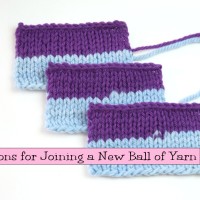
– Doing a Russian join when changing yarn works well.
Otherwise, it’s a beautiful cowl, and I’ve enjoyed working on it; I can’t wait to give it away to its recipient!
Thanks, Kyle! I’m sure your notes will be helpful to others making the cowl on the Purl Soho website!
S t a c i
Just wanted to say that I really enjoy your blog and I am learning a LOT thanks to you. Greetings from Denmark 🙂
Thank you. Now I know I need to come directly to your site. I looked at cowl and decided to save the pattern and try my first in the round project on something simple.
Hi Staci!
First of all I want to congratulate you to such a fabulous, professional and inspiring business!! Through your tutorials I have been able to take my knitting to the next and modern level.
Now my question regarding the Sideways Heringbone Stitch: I am making a simple straight scarf as well as hat with this stitch. My worry regarding the hat is that it won’t give and that the rib at the bottom of the hat, that is usually meant for give and fit around the forehead will be looser than the top part made up with the heringbone stitch. Do you happen to have any thoughts on this, that may help me with my decision? Should I make my project with a different stitch? Or would the hat give just enough even without the rib?
It would be a shame to me not to use this stitch as the person it is for actually wanted something woven and I wanted to surprise them with a knit that reminds of woven fabric.
I wish you and Parker all the best and am looking forward to many more inspiring tutorials to come!
Regards,
Dahlia
(A knitter half a world away in Europe, knitting the continental way)
Hi Dahlia – I probably wouldn’t use this stitch for a hat, since a hat should really be stretchy. I recommend looking around on Ravelry for hat patterns – I’m sure you’ll find one you like, and will also be stretchy!
S t a c i
Hi – love your tutorials!
I’m making a scarf out of this stitch and it curls up quite a bit. Did you find that when you knitted up your swatches?
If so, did blocking flatten it out?
Thanks!
Viola – if this stitch is curling up quite a bit, it will lie flatter if you go up a needle size or two. If you are using a wool or wool blend (or another animal fiber), a little bit of curling will go away with blocking.
S t a c i
Thanks heaps! I’ll let you know how I go!