
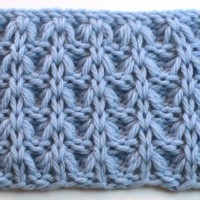
Basic mittens are quick and fun to knit, and are full of skill-building techniques you’ll use in tons of other patterns you knit.
Pattern includes three sizes – Women’s Small, Women’s Medium, Women’s Large (which is also Men’s Small).
This pattern includes links to five instructional videos to guide you through the new techniques you’ll learn.
Materials Needed:
• one skein of Lion Brand Wool-Ease Worsted (widely available at craft stores), or any worsted-weight yarn
• Set of 4 size 3 US double-pointed needles (3.25 mm)
• 2 ring stitch markers, tapestry needle, scrap yarn
Gauge: 6 stitches per inch, in stockinette
This pattern is available in three different formats, each includes links to 5-part video tutorial:
1. PDF Pattern, traditional and printable. $8.00 via PayPal![]()
2. Amazon Kindle digital download (suitable for Kindle devices and devices that use the Kindle app): $6.00 US
![]()
3. eReader (For non-Kindle eReaders, like Sony eReader and Barnes & Noble Nook, or any device using the Google Play Books app) $6.72 US


Your videos are fantastic! Thank you for coming into town! Living in Salado, I can’t always make it down to Austin for classes. Your videos have been oh so helpful!
Thanks! Janet
Your video’s are so fabulous…. some that I have ordered are the “Christmas Stocking”,and “Magic Loop Socks”. So great to be able to go back whenever to review. Thanks for all your info.
thank you so much for a very happy new year I made my first mitten I learned to knitt from my grammie at the age of 5 I am 56 and I could only knitt a straight pattern thanks to u I can make a mitten I am so excited I could never go by derections but with you at the wheel I can honestly say I am a knitter
Thank You and Happy New year
Enjoyed every bit of your article post.Much thanks again. Really Great.
Hey Staci,
My dad just got me the pattern yesterday (I’m in Middle School)I’m knitting these for my little sister, and I just need to finish a few rounds to reserve the thumb stitches!
Love it!!!
Is it possible to use the magic loop method for this pattern?
Amanda – Yes, if you’re comfortable using the magic loop method for circular knitting, that will work fine with this pattern!
S t a c i
What length of DPN’s are you using?
I bought the pattern. Is it possible to translate this to circular needles (not using magic loop). I’d like to use 12″ needles if possible.
Staci – I almost have the first mitten done and it’s beautiful! I see in the video you don’t pick up any stitches around the thumb, you just knit what you have on the holder. How do I avoid a big hole?
Hi there, I just finished my second mitten and it looks fabulous. Do have a video tutorial for the “wash and block” part? THanks!
Hi Staci-
I am using a heavier yarn for these mittens and have small wrists, will the pattern still work if I cast on 12 on each needle? This will be 36 sts instead of 40.
Thanks,
Jenna
Hi Jenna – if you’re using a heavier yarn you will still need to get gauge (6 stitches per inch) for all of the numbers and sizes in the pattern to work. Casting-on fewer stitches will result in needing to rewrite the entire pattern!
S t a c i
Hi Staci,
I am confused about working the ribbing on 3 DPNs. Forty isn’t evenly divisible by three so if I cast on 40 stitches and divide as evenly as possible over 3 DPNs, that wourld be 13 on #1; 13 on #2; and 14 on #3? To work the K2, P2 pattern, I end up with an odd stitch at the end of the needle. You said in the video you distribute so that you always end with pearl stitch and begin each needle with a knit stitch? That isnt happening for me. Should I disreagard how many stitches on each needle and just view all 40 alternating K2 and P2? Should I use 4 needles and just out 10 on each? Thanks!
HI Staci
Thanks for your tutorials, your a great teacher.
I am in the middle of knittting your log cabin blanket and just saw your Mad Men Mittens…they are fab…by any chance do you sell these already knit????
hey i love your videos but my mom bought me the ultimate sweater machine for my b-day and i wanted to make a superman sweater and i am not very good with the intarsia and far isle and was wondering if i could use duplacte stich to put a superman symbol on the front of the sweater would that work?
Hi Staci
Thanks for your patterns, they are great, started knitting my first mitten..but need a bit of help……I am working the thumb gusset and have done the setup round, what fo I do now, just knit two rounds is it?I’m just a bit confused when I get to the markers what do I do when knitting these 2 rounds, do I just continue knitting with the markers where they are?
Thanks
Louise
Your video is amazing .. it was so difficult for me to knit but not anymore because of your video.. thanks alot
I don’t have 4 needles that are the same size! I only have 2 needles for each size(except 12)!
Can you please help me?
I’m going to make 3 pairs, so I need to start right away!!! I don’t know what to do!
Hi, I love the videos. I bought the “learn to knit mittens” pattern and am having trouble with the decreasing. If I decrease between the start and the marker, it only decreases on the front of the mitten. Shouldn’t I decease *after* the marker? And can I just use the “knit 2 together” method to decrease? Thanks! Naomi
This is so much fun. What a confidence building project! However, I just did my first round on the thumb and tied the working yarn to the tail and noticed there’s a sizeable hole on the inside where the thumb joins the mitten. What went wrong? Any ideas?
Hi Frankie – glad you’re enjoying the pattern! Chances are that you aren’t doing anything incorrectly. It is normal to get a bit of a gap whenever you reattach the working yarn, like at the thumb. Luckily, you have an end to weave in there, which you can use to close up the gap.
If you feel like the gap is pretty substantial, you might want to undo the knot you tied and try tightening it up to see if that helps.
Good luck!
S t a c i
This mitten is for beginners? i never used 3 needles before.
Hi Mag – yes, it is okay if you’ve never knit on double-pointed needles before. Go ahead and watch the first part of the video tutorial. You’ll see that I explain how to work on the three needles.
Good luck!
S t a c i
I just have to say thank you for your clear, concise, easy to follow video’s. I stumbled across your site looking for help on a pattern and bingo! Now that I am venturing into projects other than sweaters I need to learn new techniques and so far your tutorials are the best! Well done and a real inspiration to try new things! Again Thank you!
I found this pattern after much searching for a basic mitten using plain worsted yarn. I just finished my first pair and am more than pleased! The instructions (with excellent videos) are clear and easy to follow. Now I am wishing for a similar pattern in children’s sizes.
i love this! I just got the pattern. Is this easy enough for a begginer who can knit magic loop socks?
Yes, Sacia – with the help of the videos, you should be fine.
🙂
S t a c i
thanks so much staci!
Hi Staci, I want to tell you how wonderful your tutorials are. I’ve flirted with knitting for quite some time but only recently decided to take it more seriously. I taught myself to crochet back at the beginning of time so I figured knitting would be easy to learn. Not so much. . So, I turned to the internet. Searching led me to your videos and my love of knitting took off. You teach so well…concise, clear and easy to understand. Thank you for sharing such a wealth of knowledge with the rest of us.
If you desire to improve your familiarity just
keep visiting this website and be updated with the most up-to-date news posted here.
I am getting supplies together to make this pattern. What length are the double pointed needles? As this would be my first project in the round should I buy a larger length? Thanks!
Megan – I don’t recommend using the little short DPNs, not even for socks. Too much of a risk of stitches jumping off! I like to use 7″ or 8″ needles.
S t a c i
Love your tutorials. I was having problems finishing a sock until I found your website. Finished them with your help and now I’m moving on to your miitens. Thanks a million!
Staci, In your knitting mittens pattern it says to continue knitting the hand section until it measures to the top of the pinkie finger, or 4.5 inches for the size I’m making. Does this mean from the point where the ribbing ends after you’ve completed the ribbing to begin the actual mitten, not from the edge of the mitten itself? I hope this question makes sense. Also, for me the most difficult part so far has been the actual casting on of the stitches at the beginning. I still consider myself a novice-knitting only hats and scarves thusfar. Thanks. B
Bill – yes, the pattern gives you measurements for the stockinette section, “from the top of the cuff”, so your measurement is after the ribbing.
S t a c i
Hi Staci, I loved the socks so am now making mittens! BUT am stuck. It could be my British brain…hope you can help. I’m decreasing the hand and have done half the set up round, placed marker. Now I’m doing the next round and got to the dreaded * * bit that always terrifies me. Where should I have placed the second marker? I assumed it was just the end of the round (long tail cast on thank you for that) except now I’m in the midst of the * * nightmare I see it can’t be because I’ve just got to the ‘knit to 3 stitches from the marker’ part and I’m completely adrift from my marker, it’s miles away! Where have I gone wrong? And how can I correct it? Find undoing DPN more scary than * *
What a long question!
Love your videos. You have made my knitting life better! Thanks. Max.
Max – I’m not sure why you’re confused…you said you did half of the setup round, then placed the marker. That is correct. Your stitches and marker should look like this:
marker at the beginning of your round / half of the stitches / marker at the halfway point / second half of the stitches
Don’t let the asterisks confuse you. You just repeat what is between them, following the pattern.
S t a c i
Staci, I hate to be a pest, but when you get to the “finishing thumb” section in your video you tie the new yarn tail and the working yarn in a knot to close up the gap where the hand and thumb join. I assume this is instead of the written pattern directions that say you pick up and knit 1 stitch over the gap. (I tried this method on another sample mitten and found it very confusing and unsatisfactory.) Thanks for you patience. B
Bill – it is both, not one or the other. I attach the yarn and pick up and knit a stitch, and after one round, I tie the tail end to the working yarn to secure it.
S t a c i
I’ve always wanted to learn how to knit mittens. I watched your tutorial and decided to purchase the pattern. Now, only part 1 of 5 tutorials is available for viewing on youtube! Help!
Thank you,
Margaret
Margaret – there are only five parts to the tutorial, so you have the whole thing!
🙂
S t a c i
hi you don’t have how many stitches u need to cast on three needles van u please let me know that way I know how many to put on all three thanx
Terri – all of that information you need to knit the mittens (including cast-on numbers) is available in the downloadable pattern.
S t a c i
Hi Staci, will the women’s small size fit a child? Thanks!
Nini – depends on the child, but no…the small woman’s size is not sized for children.
S t a c i
Hi! Thank you so much for having matching videos with your patterns. I like the supplemental videos to verify that I am following the pattern correctly. Quick question, your pattern says “when you get to the base of the thumb again, pick up and knit 1 stitch over gap.” However, your video does not show you picking up a stitch. Instead, it shows you typing a knot with the tail and the working yarn. The video and pattern don’t match up. Can you please explain what I should do at this point in regards to when to pick up a stitch and when to tie? Thank you so much!
Kerri – while I demonstrate techniques in the video, you always want to follow the written pattern for the most accurate instructions, row-by-row. You can do both – pick up a stitch over the gap, and tie a knot to secure the tail end.
S t a c i