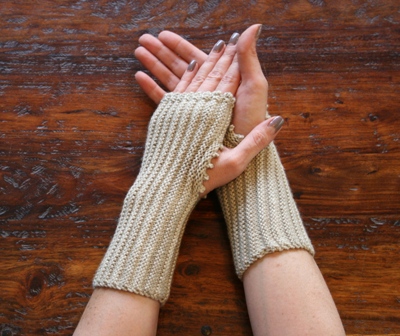
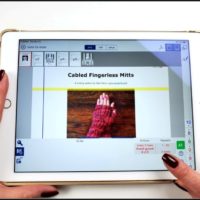
You can get your free copy of the pattern here, and follow along with the video tutorial.
This pattern is designed by Annie of knitsofacto.blogspot.com. Many thanks to Annie for letting us use her pattern in this tutorial! You can see Annie’s other designs here.
Yarn weights notes: In this tutorial I talk about “worsted” weight and “DK” weight yarns. Worsted weight yarn is also called “10 ply” in some parts of the world, and DK is also known as “8 ply”. DK weight and Sport weight (aka 5 ply) are close enough that you can get gauge for this pattern with either.
Information on things you’ll see in this video:
The sweater on the mannequin is my Learn to Knit a Women’s Sweater, pattern + video tutorial.
The circular needles I’m using are Knitter’s Pride Symfonie Dreamz interchangeable needles.
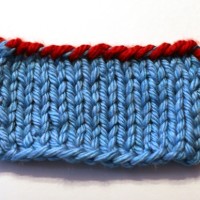
The red yarn I used for the cast-on is Lion Brand Thick & Quick in Cranberry.
The bulky turquoise yarn I used is Lion Brand Hometown USA in Charlotte Blue.
The DK mitts I made in the oatmeal color are made with Madeline Tosh, Tosh Sport, in Luster.
The worsted-weight mitts I made in the brown color are made with Dream in Color Classy, in Tea Party.


Staci:
I enjoy all your videos and often (very often) visit your site to refresh my brain on a stitch technique. I am confident when I purchase your patterns that they will work out perfectly – and they do. I made fingerless mitts as gifts last Christmas but would have enjoyed this pattern for my niece – very feminine.
Thanks for all your great patterns, ideas, videos, and encouragement. I recommend your site to anyone I know that knits or is just learning to knit.
Am i able to make them more maskuline. I love the way that they are knitted, i just think they are to feminine
Yes – just skip the picot edgings!
S t a c i
Hi Staci, Thanks for another great video and thank you Annie for the beautiful pattern. I have not worked a 3 needle bind off before so I look forward to working it when I knit this pattern. I love the picot edging, it is very feminine and I incorporate it quite often in hats as well as mitts. Good job and well done.
How can I make a picot edge on the wrist end of the mitts?
Leah – I’m afraid I can’t tell you that off the top of my head…you would need to rewrite the 2-row picot edge instruction so that the first row of the edging starts at the beginning of a row (instead of the end), and the picot edge second row finishes at the end of a row (instead of the beginning).
S t a c i
So pretty!!!!!!!!!!!!!!!!!!!!!! Just got the pattern!!!!!!!!!!!!!!!1
Hi Staci!
Just one quick question regarding this pattern. Do you use size 2 needles whether you are using DK or sport weight yarn? Thanks!
Annelie
Yes. Needle size doesn’t change.
S t a c i
Hi Staci,
I am a new knitter and I just wanted to tell you that you are an amazing teacher. Your videos are very helpful and your method of teaching is clear and easy to understand. I do want to ask you about provisional cast on. I must have done my casting very tight because I had a very hard time putting the stitches back on the needle. In a moment of weakness I pulled the needle out… yes I know I shouldn’t have done that but I am trying to avoid unraveling everything and starting over again. Do you have any suggestion as to how I can sew the two sides together? If that is not a good idea I don’t mind unraveling and redoing it but I think it would be best if I know how to avoid the same mistake again.
Many thanks in advance
Nazie
Nazie – thank you for the note. I’m not sure I understand what happened, but it sounds like you’re no longer able to use the 3-needle BO to seam your mitts? If so, you can always use mattress stitch: https://verypink.com/2010/11/17/mattress-stitch/
Hope that helps!
S t a c i
Hi Staci,
I just watched the video and that is exactly what I needed. Thank you so much!
I am subscriber on your youtube channel and I find myself on your web site all the time! I am a big fan.
Thank you
Nazie
Hi Stacie:
LOVE your website and work. Thank you so much for all your work. It’s my first “go to” when i want to learn something.
I’m dying to make these Runrig Mitts, but the written pattern on the website has been “damaged” and i’m unable to view or download it. Is it in the process of being fixed or can I obtain this pattern by some other means so that I can follow your tut? My first scan of Noro awaits!!!!
Cheers,
Theresa
Hi Theresa – sorry, I don’t know! This pattern belongs to the designer, and she is in charge of that. Try refreshing the web page and see if that helps…if it doesn’t, you can email knitsofacto on Ravelry and ask her if there is an issue.
S t a c i
Love how the 3 needle bind off worked up! If i didn’t know better i wouldn’t know where it started or stopped, leaving the seam almost invisible. Thanks Staci
Stacie, I happened upon your website just one year ago and fell in love with it. I have not knitted over the summer and just tuned into your website again. All I can say is WOW!!! I double love it now!!!!!!. Your tutorials are head and shoulders above any others. The finishing touches on a project is what makes it an outstanding piece. Your attention to detail and having beautifully completed articles is what attracted me back to knitting. Thank you very much!
Hello, Staci! I’m not a beginner, but I learn always something.
Your esplanations and your video are wonderful.Thanks from Italy.
the written pattern can be found at this address
http://knitsofacto.files.wordpress.com/2013/07/runrig-for-publication-stalls-version.pdf
The link is on the knitsofacto blog under cosy muffatees. here is the BlogSpot address
http://knitsofacto.blogspot.co.uk/2012/01/cosy-muffatees.html
Hi Staci,
Thank you for the tutorial! very excited to start making these as I’m more than hopeless with dpn’s. Love your tutorials you taught me a lot of techniques!
Hi Staci!
Is it possible to use size 2 circulars for this pattern, rather than the straights? If so, would a 24″ cable be long enough? Love your videos!
Thank you,
Rachel
Staci,
I have cast on 3 times and no matter what, my slip stitch and knot are on the cuff end not the picot end. I noticed when you remove the provisional cast on you start with the end that has no knot and your at the cuff. What can I be doing wrong?? Looking at the video it seems that when you start out your knot is also on the cuff,end but when you remove the cast on the knotted end is on the picot end. I’m confused.
I’m a new knitter, I’m probably reading something wrong but for the life of me I can’t figure out what.
Thank you,
Jeri
I did the provisional cast on and followed the pattern by knitting 53 stitches and i was wondering why my work is so long. All of the pictures and your other samples seem so short. Will the project get shorter as it progresses or am i missing something?
Selah – my first thought is that your gauge is probably too loose for this pattern if your CO row looks much too long. You probably need to knit a bit, check your gauge, and go down a needle size or two if your gauge is too loose. Here is my video on checking gauge: https://verypink.com/2010/12/21/checking-gauge/
S t a c i
I am so glad you knit English style. That is the way I knit and I can follow you better! I love your classes!!
May I sell the item at a local craft shop?
Diane – you will need to email the pattern designer. (I did the tutorial for this pattern, but it is not my design.) You can check with her to make sure selling items knit from the pattern aren’t against the copyright.
S t a c i
Well I am going to give these a try today. I have to get some supplies first. The tutorials were great. They really help make since of the instructions. I have always been a visual person. Thanks
Hi Staci…
I absolutely love these gloves. It took me a bit to get the hang of the edging…but I finally did and it is beautiful. A million thanks for your video…I would not be able to follow the pattern otherwise! My only question is at what stitch do I begin the thumb? On the last row this is to be done and I don’t know how far I should measure up before starting??? Should I just use my own hang for measure?
Thanks,
Angie
Hi Staci,
I am a big fan of your website so thank you. My first project is the runrig mits. In the pattern we repeat row 1 and 2 do a first thumb hole row then second thumb hole row which turns out to be a picot edge not the knit edge you continue with. Where did I Go wrong?
Thank you
Hi Staci,
Love your site! while doing the runrig mits, repeating row one and two, doing the first thumb hole row and then the second thumb hole row I end up at the picot edge rather than the knit edge. What did I do incorrectly?
Thanks
Hi Staci I have come to the first thumb hole row and am having the same problem a few others here have mentioned and I desperately hope you can help me!! In beginning the first thumb row I am on the picot edge, and in my hand the pic of edge faces right and the knot edge faces left. In other words the knit edge is in my left hand. On the video your work is in the exact opposite direction. Could you please tell me what I need to do to fix this? I have 55 stitches, pic of edge right hand, ready to begin thumb row. I hope I hear from you! Thank you.
Hi Staci I have come to the first thumb hole row and am having the same problem a few others here have mentioned and I desperately hope you can help me!! In beginning the first thumb row I am on the picot edge, and in my hand the picot edge faces right and the knit edge faces left. In other words the knit edge is in my left hand. On the video your work is in the exact opposite direction. Could you please tell me what I need to do to fix this? I have 55 stitches, picot edge in right hand, ready to begin thumb row. I hope I hear from you! Thank you.
I’m fairly new to knitting and your explanations and demos are very helpful and professional looking. I’ve watched and saved many of your videos.
This is such a nice pattern and pretty easy thanks to your video. I love this stretchy and cushy stitch pattern. I bet this could be adapted to make a nice pair of leg warmers too. Thanks so much!
Your videos are fantastic and so helpful for a new knitter!
I had a question about gauge for this project. It seemed to me like gauge isn’t 100% crucial since gloves can vary in length without ill effect; the important part for fit is to knit the correct width of fabric before doing the thumb rows and the bind off (i.e. one could just repeat the welted pattern more or fewer times). Would you agree? If so, can you tell us how many inches or cm of fabric one should create before doing the thumb rows and bind off?
Anne – the gauge is not super important in this pattern, you are correct. I did this video a while back and I no longer have the mitts here to measure…you might try contacting the pattern designer directly (Ravelry message is a good way) to get an answer to your measurement question.
Good luck!
S t a c i
Staci
Love these gloves and love the tutorial! My question has been asked, but I don’t see an answer for it – at what stitch do I begin the thumb? I have not started to knit the gloves yet, I have all my supplies and have read through the pattern, but I don’t see where it tells me how many stitches in I start the thumb hole?? Or is it me – when I come to that point will it be self evident?
Thanks,
Debi in Canada
Debi – I did the tutorial on the pattern, but you’ll need to contact the designer for pattern support. A good way to reach her is through Ravelry message.
S t a c i