After hours at the YouTube Space LA, I gave my friend Sunshine from The Haunting of Sunshine Girl a mini knitting lesson. Spooky things go on in the YouTube Space late at night! Visit Sunshine’s video to see what happened after the knitting lesson!
Outline Stitch Bind-Off
Instructions for working this bind-off:
Set yourself up so you’re ready to work a wrong-side row. With the right-side of the work facing you, and the tail end of the yarn coming from the left side of the work, break the yarn, leaving yourself a tail that is at least twice the length of the width of the work. Thread the tail end on to a tapestry needle.
*Working from left to right, skip the first stitch. Go in to the second stitch as if to purl (from right to left), then through the first stitch the same way. Paying careful attention to tension, pull the working yarn tight, and slip the first stitch off the end of the needle.* Repeat between the *s to the last stitch. Put the needle in as if to purl, tighten, and weave in the end to finish.
Information on things you’ll see in this video:
The sweater on the mannequin is my Ombre Dyed Sweater, pattern + video tutorial.
The bulky yarn I used for demonstration is Lion Brand Hometown USA. I demonstrated using size 13 US (9mm) needles.
The needles I used are bamboo, made by Clover.
Icelandic Bind-Off
Instructions for working the Icelandic Bind-Off:
K the first stitch.
*transfer stitch from the right needle to the left, giving it a little twist so that it is mounted correctly. Put your right needle through that stitch, as if to purl, reaching through to knit the next stitch normally (through the front loop)*
Repeat between the *s until one stitch is left. Break yarn, pull end through last loop, tighten to fasten.
Information on things you’ll see in the video:
The bulky yarn I used for demonstration is Lion Brand Hometown USA. I demonstrated using size 13 US (9mm) needles.
The needles I used are bamboo, made by Clover.
The sweater on the mannequin is my Ombre Dyed Sweater, pattern + video tutorial.
Interview with Judy Graham – “Knitting Tips by Judy”
When Hollywood needs custom knits for tv and movies, who do they turn to? Judy Graham! You might know Judy’s name from her website and YouTube channel, Knitting Tips by Judy, as well as her video blog (links below). This video was shot at the YouTube Space LA on my recent trip to California.
Judy has so many great stories and mementos from her work in Hollywood, and it was a pleasure to get to know her. We had a great time doing this interview!
Links to find Judy –
Judy’s website, Knitting Tips by Judy.
Judy’s Knitting Tips by Judy YouTube channel.
Judy’s video blog.
Judy on Facebook.
Fancy Stitch Combos – Bead Stitch
To work this stitch flat:
Cast-on a multiple of 7 stitches.
Row 1 (RS): K1, k2tog, yo, K1, yo, ssk, *K2, k2tog, yo, k1, yo, ssk* repeat between *s to last stitch, K1
Row 2: *P2tog tbl, yo, P3, yo, p2tog* repeat between *s to end
Row 3: K1, yo, ssk, k1, k2tog, yo, *K2, yo, ssk, K1, k2tog, yo* repeat between *s to last stitch, K1
Row 4: P2, yo, p3tog, yo, *P4, yo, p3tog, yo* repeat between *s to last 2 stitches, P2
To make the prettier side of the CO the right side of the work, start on Row 4, then work through Rows 1-4 normally.
BO normally after Row 4.
To work this stitch in-the-round:
CO a multiple of 7
(If you’re using DPNs, put a multiple of 7 stitches on each needle)
Round 1 (RS): K1, k2tog, yo, K1, yo, ssk, *K2, k2tog, yo, k1, yo, ssk* repeat between *s to last stitch, K1
Round 2: *k2tog, yo, K3, yo, k2tog tbl* repeat between *s to end
Round 3: K1, yo, ssk, k1, k2tog, yo, *K2, yo, ssk, K1, k2tog, yo* repeat between *s to last stitch, K1
Round 4: K2, yo, k3tog, yo, *K4, yo, k3tog, yo* repeat between *s to last 2 stitches, K2
Information on things you’ll see in this video:
The green swatch is knit with Be Sweet Whipped Cream yarn in color Moss, using size 9 US (5.5mm) needles
The cotton blend pink swatch is knit with Knit Picks Comfy Sport in color Rosebud, using size 7 US (4.5mm) needles
The DK weight, dark pink swatch is knit with Madeline Tosh, Tosh Sport, color
Vermillion, using size 10.5 US (6.5mm) needles
The sweater on the mannequin is my Ombre Dyed Sweater, pattern + video tutorial.
Ten Stitch Blanket
Click here to get your free copy of the pattern!
IMPORTANT NOTE: The pattern designer has updated and changed the pattern since I released the video tutorial in 2013. The construction and the techniques used are the same, but the row-by-row instructions I use in the video are different than written in the updated pattern. Please follow the pattern for row-by-row instructions.
This pattern is designed by Frankie (Rosemily on Ravelry). You can see her other designs here.
To learn more about Frankie’s work with the Children’s Liver Disease Foundation and to donate, visit her website.
Many thanks to Frankie for the great pattern!
To see thousands of examples of this finished blanket by other knitters, visit the Ravelry project page.
Links to the different video parts
Part 1: Intro
Part 2: Mitered Corners
Part 3: Picking up stitches on the flat sides
Part 4: Using markers to keep careful count
Part 5: Finishing
Information on things you’ll see in this video:
The yarn I used in my finished blanket is Berroco Vintage, in colors: cream – 5104, purple – 5155, and petunia – 51105. I bought three hanks of each (but only used 2 of the cream), using size 7 US (4.5mm) needles. After machine washing and drying, my blanket is 40″ square, with a gauge of 4.5 stitches per inch.
The bulky yarn I used for demonstration is Lion Brand Hometown USA. I demonstrated using size 13 US (9mm) needles.
Clippie markers like the ones I use can be found here.
The sweater on the mannequin is my Ombre Dyed Sweater, pattern and video tutorial.
To change color with a clean color break, start your new color in the first row of a mitered corner. Instead of slipping the last stitch in the first row of the mitered corner, knit all the way across. Then work the rest of the corner as written.
To bind-off at the end of this project, BO normally (knit-wise) on the wrong side of the work.
Choosing a Sweater Size
In this video I give you some pointers on choosing the correct sweater size in a pattern. Since patterns are written differently, these are sure-fire ways to get it right. I also talk about how to fit a sweater when your largest measurement is not chest/bust, but hips or belly.
This website will show you how to accurately measure for a sweater.
The shawl on the mannequin is my Learn to Knit an Aran Shawl, pattern + video tutorial.
The website I recommend in the video is Ravelry.
My “Embrace the Swatch” mug can be found here.
Steaming-Out Yarn Kinks
This video demonstrates a method for smoothing and straightening a few yards of kinked-up yarn, after you’ve ripped back to correct a mistake. If you have more than a few yards to straighten, you’ll want to follow the technique I demonstrate in this video, Reusing Yarn.
The shawl on the mannequin is my Learn to Knit an Aran Shawl, pattern + video tutorial.
A blocking board like mine can be found here.
My “Embrace the Swatch” mug can be found here.
Loveknitting.com Interview
I did an interview earlier this week with LoveKnitting.com, and the blog post just went live today. I’m their “Blogger of the Week”. You can see the post here. If you leave a comment on that post, you’ll be entered to win a free copy of my Shaker Dishcloth pattern.
Other than that, it’s 102 degrees Fahrenheit in Austin, Texas right now (and rising). Brutal! We’re all taking it easy this weekend.
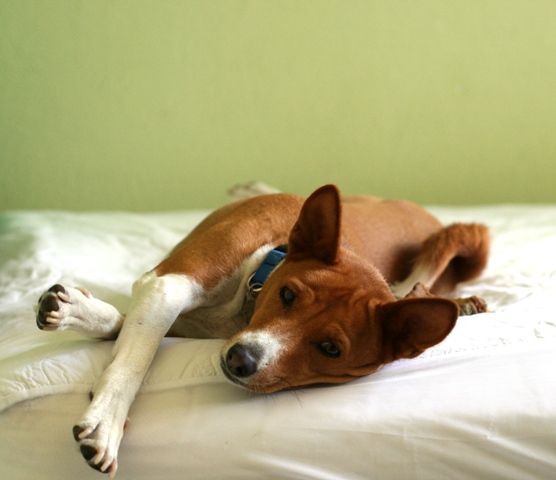
Tippy looks so worried in this photo! He isn’t worried about a THING, I promise.
Fancy Stitch Combos – Waffle Stitch
Instructions for working the Waffle Stitch:
Cast-on a multiple of 3 stitches, plus 1.
Row 1 (WS): K1, *P2, K1*, repeat between *s to end
Row 2: P1, *K2, P1*, repeat between *s to end
Row 3: K across all stitches
Row 4: same as Row 2
Work to desired length, bind-off normally on Row 3.
To work this stitch in the round:
Cast-on a multiple of 3 stitches.
Round 1: *K2, P1*, repeat between *s to end
Round 2: *K2, P1*, repeat between *s to end
Round 3: P across all stitches
Round 4: *K2, P1*, repeat between *s to end
Work to desired length, bind-off purl-wise on Row 3.
Information on things you’ll see in this video:
The green sweater on the mannequin is my Learn to Knit a Woman’s Sweater, pattern + video tutorial.
The bulky orange yarn I used in the sample and for demonstration is Berroco Peruvia Quick.
The DK weight yarn I used in the striped sample is Madeline Tosh, Tosh Sport.
The long-strand dyed yarn I used in the sample is Noro Silk Garden Chunky.
The wood needles I use for demonstration are by Clover, size 10.5 (6.5mm)