
I’m so excited about this sweater! I want it to get cold in Texas so I can wear it now!
In this two-part tutorial, we’re going to learn how to do something very unique. We’re going to knit this sweater using undyed yarn, then dye it (as a completed garment) to get the Ombré effect. Ombré dyeing gives us a very light color at the top of the sweater, gradually getting darker toward the bottom.
There are two videos to accompany this pattern. In the first video, we talk about making the sweater itself. In the second video, we go on location with my friend Doug Upchurch, at his White Bear Fibers dyeing studio, where he shows us how to do the dyeing. (Both videos are at the bottom of this post.)

I love the look of this sweater. Not only is the dyeing a fun project on its own, but it gives us an effect you can only get when you dye the finished sweater.
In the dyeing video, we use acid dyes, but any dye that works with yarn will do. Here are three tutorials for using different kitchen-safe dyes: Kool-Aid , Food Coloring, Wilton’s Icing Gel.

Detail of the lightest part of the sweater (the neckline) next to the darkest (the sleeve cuff).
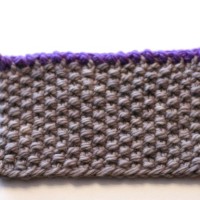
This is knit with sock yarn for a lightweight sweater with a nice drape. The style of the sweater is simple, to really show off the color gradation as the “thing”, or the prominent design feature.
You can, of course, make this sweater using sock-weight yarn that is already dyed. (I’m pretty excited to see what you knitters do with this.) The pattern is sized from XS to 3XL.
Sizes: XSmall, Small, Medium, Large, XLarge, 2XLarge, 3XLarge [to fit actual chest measurements of 28” (32”, 36”, 40”, 44”, 48”, 52”)]
Needles: Size 6 US circular or straight needles
Yarn: Knit Picks Bare Stroll Fingering Sock Yarn, 462 yards/hank, 3 (3, 3, 4, 4, 5, 5) hanks
Additional Materials: stitch marker, tapestry needle, row counter
Gauge: 5.5 stitches and 7.5 rows per inch in stockinette. (Stitch gauge is very important, row gauge is less important. Base your needle size on stitch gauge if you’re having difficulty matching both.) Be sure to measure gauge after you’ve washed and blocked your swatch.
Note on Sizing – The measurements above are for the actual chest measurement of the sweater wearer. The finished sweater includes “ease” for a casual fit. The measurements of the finished sweaters are 32 (36.5, 41, 45, 49.5, 54, 58.5)”.
Pattern + links to 4-part instructional videos $8 US via PayPal ![]()
Video Part 1 – Making the Sweater:
Video Part 2 – Dyeing the Sweater:

YOU ARE A GENIUS!!! How COOL!!!!!
You might want to check out your first video. At least when I viewed it it stopped in several areas and I had to manually jump ahead on the video in order to get it to go on.
Thanks though for the content…as Always, Nicely done 😉
Thanks, Sheila. The video is actually running fine – usually when there is a problem with the video stopping, it’s because of the viewer’s connection to the internet. Just hit “pause”, allow it to load for a few minutes, then watch after it’s had some time to buffer.
🙂
S t a c i
Magical Staci! This year I vowed never to make anything that was not top-down and all one piece because I hated seaming! But now you have given me new confidence in seaming! I love how you leave it loose and then pull it to a magically perfect seam!
The dying video was great too. Can’t wait to try that as well!
I’ve heard of ombre fabric but never this. How ingenious–again! I’ve purchased the pattern and was wondering about the sizing. According to the measurements I would need a medium, but my tummy is my problem area, and it’s much larger than my bust area. What should I do in a case like this and knowing what size to choose to knit it in?
Hi Karen – thanks for the note! If I were you, I’d go ahead and knit the large. There really isn’t much difference in the shoulders between the two sizes, so that shouldn’t be an issue. You’re absolutely right – since there isn’t any hip/waist shaping in this sweater, you want to pick the size that fits your largest part. Does that make sense? 🙂
S t a c i
What a great technique. The yard looked so soft and luscious even before you applied the color, but I wanted to eat it once you were done! Looking forward to trying this. Thanks.
I had a smile on my face the whole time with my heart beating with anticipation of the end result! Best show ever!! Can hardly wait to try it. Thanks Staci!
Staci – wonderful job you did!
You could have a great success on Craftsy.com
Thank you, Iryna. You’re right – the platform at Craftsy is very nice, but I don’t want to charge that much for my videos! I like keeping all of the videos available to everyone for free, and charging a small amount for the pattern itself. I like having that setup for my viewers and customers.
Thanks again for the note!
S t a c i
Just ordered all I need to make this sweater. I look forward to this challenge. The videos are perfect, as always!
Hi Staci! Thanks for another great video tutorial! It’s great to watch a video where you can actually see what is going on. 🙂
I have a construction question with regards to the collar of this sweater. Could the last rows of the fronts be left live and then grafted together using Kitchener Stitch to eliminate the vertical seam at the back of the neck, or would that cause issues with seaming the collar to the back? (Maybe work one fewer row on each front so that the grafted collar is not longer than the neck edge on the back since Kitchener would add a row of knitting between the pieces as opposed to the traditional seaming of the bound off edges which eats up a row of stitches in the seam?) Thanks!
Hi Tammy – yes, that would work fine. You could either graft them together using kitchener stitch, or a 3-needle bind off.
I’ll tell you why I didn’t do it that way…first, I wanted to seam the collar to the back neck first, then seam the vertical seam at the back of the neck. Second, I knew these pieces were going to be bouncing around in my knitting basket for a while, and I was going to be pinning them out and steaming them before seaming. It just made sense to me to bind off those few stitches so that I wouldn’t risk having anything come unraveled.
But really – you can leave the stitches live if you wish. 🙂
S t a c i
OMG, I’m knitting Wendy D Johnson’s Summer Solstice Shawl in Knit Picks Bare and am planning to dye it after complete.
Came to this decision though lack of making the decision of what color I thought it should be.
Now, here you are, telling how I can accomplish this.
How wonderful, Staci! ! ! !
I will be bookmarking THIS POST and refer to it often.
Thanks soooooo much.
hugs
Understand about Craftsy. You are very kind to us, Staci. Thank you! ~ Iryna
This was freaking AWESOME!!!!!!!!
Staci- This was such an awesome tutorial! Probably my favorite so far. It was great to see how excited you were during the dyeing process. It was also great to see another male knitter! I need to go check Doug’s website now. Thanks for all you do!
I love the sweater Staci,, got my pattern, got my new addi needles you suggested, getting my yarn tomorrow, I’m set for the weekend:) I’ll post my sweater when I’m finished!!!!
Great videos! In watching the first one, around minute 15 or 16, you spoke of wet dying and wool soak but then said not to use soap because it might cause the dye to splotch when applied. Question: is wool soak considered a soap, then, or is it still safe to use pre-dye?
Hi Andrea – thanks for the note. I actually say “wool soap”, not “wool soak”. The rule is, if you plan to dye the sweater after it’s knit, to use only plain water on it before dyeing it. I make the distinction, because I’ve mentioned blocking in my videos over and over again, and I wanted to make it clear that we *normally* use wool soap, just not this time.
🙂
S t a c i
I just wanted to write and THANK YOU for your videos. You are my go-to person when learning how to knit. You have seriously helped me out countless times. Just tonight I was learning what M1 meant. I knitted and pulled my work out several times based on another’s confusing how-to video. Once with your’s and my bootie is moving along FINALLY. Has anyone ever told you that you look like Drew Barrymore? Thanks again!
I realy like your video I go to very pink.com every day and in this video I think you should have made a video on ho to knit the parts when i WATCHED IT I wanted to do it but I did nit know how to knit the parts so I could not I started kniting this year when I was ten but when I was 11 I went to you site and lerarned how to do it right so when I teach my friends how to knit I tell my friends abouts your website Im am a adcance beginner and when you dont teah how to do certain part s I get stuck. And it all so would be nice inf you exlaned more so I wouldnt get stuck. sorry this commet so long and you do an aewesome job and I would like to learn how to knit that cute pink scarf that your wear in your videos
Timara – I address this in the video…this is an intermediate pattern. That means that you need to be comfortable the basics to knit this – casting-on, knitting, purling, k2tog, ssk, and binding-off. I don’t cover the knitting part in the video, because knitting the pieces is pretty simple for an intermediate knitter.
I have videos on all of these techniques – maybe with a little practice you’ll be ready to knit the sweater!
Hope that helps.
S t a c i
I am NOT a freak after all. I have been knitting for 50 years and do not and have never had a stash!
I don’t even knit, but you make me want to learn.
Awesome sweater!!
Hi Staci, I’m a pretty good knitter but not a regular swatcher. For this project I’ve purchased your pattern and the same yarn you used (Knit Picks Bare Fingering Weight) and have duly swatched with 4mm needles but alas, still come up with 7.5 sts/inch rather than your recommended 5.5 sts. (Yes, I’ve washed and blocked.) I love the little swatch fabric and am reluctant to go up a needles size to get gauge. My question is: why do you use 4mm needles when the yarn band only recommends 1-3.25mm?
I’m trying to be really nerdy about this because I rarely knit fitted garments. Talk me down! 😉 Thanks.
Hi Melissa – good for you for swatching, but you MUST GET GAUGE. Otherwise, your sweater is going to be way off in size!
The ball band gives you a needle size and a gauge for that needle size, as a way for you to understand the weight of the yarn. The needle size is “recommended” but only loosely. It’s also likely that the recommended needle size is for socks, not for a sweater. Regardless, I used a needle size that will give you a lightweight sweater with nice drape.
Good luck – I hope you nail the gauge on your next swatch!
S t a c i
Okay. I’ll swatch again in 4.5mm and maybe 5mm to try to – no, WILL…achieve gauge.
Many thanks for the quick reply Staci! How lucky we are to get such personalized knitting advice!
I found your blog by a happy accident — love the ombre dyeing video!
I was blown away by these 2 videos! And you are very good to consider the cost for your fellow knitters [aka: your followers]. I found myself just as giddy watching and waiting to see how different the levels of color came up out of the dye. It is such a beautiful sweater and I plan on trying to make it, too. My friend has used Kool-Aid to dye some of her yarn – seems to be cheaper and easier.
Thanks so much for another awesome presentation!
I want to make this sweater using knit picks palette yarn and not dye it. The palette yarn is fingering weight. I love color knitting and want to use some fair isle designs on the sleeves and body. What do you think as to how well the yarn and fair isle designs would work?
Marie – in my experience, Knit Picks Palette yarn works up very well in fair isle designs. It will work for this sweater, provided you can get correct gauge – even over the fair isle sections.
Good luck!
S t a c i
I too loved the video about dyeing this in ombre color. I am always in awe of people that figure out these variations. I have knitted for about 50 years off an on. I did alot of quilting in between and still love to do that. Your videos are so easy to understand and I want to make everything you have shown us. Thanks for the “free” videos and “free” patterns.
Staci I have learned so much from YOU ! As I told you in a previously post, I haven’t knitted since I was taught at the young age of 9 yrs, when a fabulous lady taught me to knit when I camped at a campground with my family. I have so many fond memories of that time 48 yrs ago ! You have brought back so many memories as I have followed your videos learning to knit once again…Thanks so much! This newest article sounds like so much fun….I can’t wait to try it !
All the best !
Hi just watched most of your videos,I think you are a great teacher,I am not a knitter,but I am going to try your petal drop scarf.I must say again you are very talented and inspirational.
Staci,
I have a question about the sizing on this sweater before I buy the pattern. I have a very petite frame at 4’11”. I usually wear petite xs/s in most tops and especially sweaters. Can this pattern be adjusted for my petite size?
Thanks in advance!
Martha
Martha – yes, it should be pretty easy to modify the size for you. You can knit the XS or S size, then just adjust the sleeve length and sweater length to your liking.
S t a c i
Hi Staci
Thanks Staci for your help as you suggested I followed your advice on how to insert my sleeves and it has worked well. However I am struggling with my sleeve side seems,(from cuff to armhole) the stitch I am attempting is mattress stitch, but this part of the sleeves where there are increases stitches, is where I am struggling to get a neat finish, I just don’t seems to have master this part of mattress stitch very well, I am fine in straight work but where there in shaping not so good!!- wonder if you have any other video pointers that would help me. Many thanks for sharing 🙂
Chrisann – If I remember correctly, you are not using this pattern, but using this video as a guide to help you with the sweater you’re knitting. The mattress stitch is the correct stitch to use. As long as you’re careful with your seaming, and you have enough light to see that you’re doing it correctly, washing and blocking should take care of an unevenness you see in the seam over the sleeve decreases.
Good luck!
S t a c i
I just dont have the guts or the patience to knit anything with sock yarn!
To fine a guage for my very impatient self
Staci, what size of double pointed needles (long wise) do you recommend?
I have seen 5cm on up to 8in. with all I knitting sized needles. I just
need to know how long they should be to make them easy to handle for the
patterns. BJ.
BJ – I always choose 7 or 8″ needles. It’s really just a personal preference.
S t a c
Hi Staci, I really enjoy your videos! I bought the pattern and have checked my gauge. So, I’m about to start, but have a question. For all of the sections, when you get to the part of the pattern where the decreases begin, you have an “A”, “B”, and “C” with different instruction for each. I’m not clear on whar the letters are referring to. Can you explain? I looked at the diagrams at the end of the pattern thinking there would be references to these letters, but didn’t see them. Thanks for your help.
Nancy – don’t overthink those letters. 🙂 They are really just separating the parts where two rows are worked a multiple number of times to create the gradual decrease. Just work straight through them, following the instructions for the number of times to repeat each section.
S t a c i
I love your two circular magic loop socks two at a time, especially the new heel. It’s a winner. Thank you for your free lessons I have learnt so much.
I have arthritis in my hands and I think the shorter circulars are easier on my sore joints – do you know a way to reduce hand pain at the base of the thumb while knitting with circulars ?
More hand dyeing finished projects please!
Simone – thank you for the note. I’m afraid the only way I know to ease hand pain from knitting is to rest your hands, and stop knitting for a while. I’m sure you can find some YouTube videos from physical therapists who can offer advice on stretches and exercises – but I’m no expert in that!
Good luck –
S t a c i
My favorite colors! I’m a fellow Texan (San Antonio) I love your tutorials and this will be my next purchase
Am unable to connect yo web you provided (white bear fibers look it’s a very pink white bear). It brings up hundreds of combinations of things and cannot find your pattern for this ombré dyed sweater. Any suggestions for mr finding this pattern. Thank you
Bonnie – the link to purchase the sweater is here on this web page where you commented: https://verypink.com/2012/07/18/ombre-dyed-sweater/
Just click the “add to cart” button to purchase the sweater pattern.
S t a c i
Got it thanks for responding. Also found it on your ravelry page