Our lovely sponsor this week:
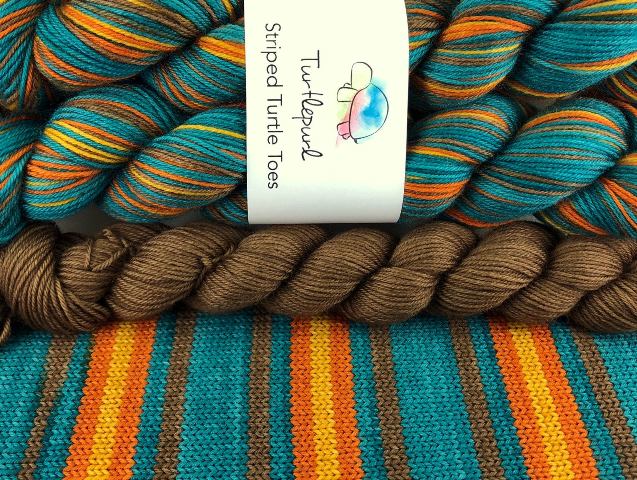
Turtlepurl Yarns
For 15% off the month of October, visit Turtlepurl Yarns and use the code VPOCT19.
Look, brand new colorway! This one is named “It Takes a Village”.
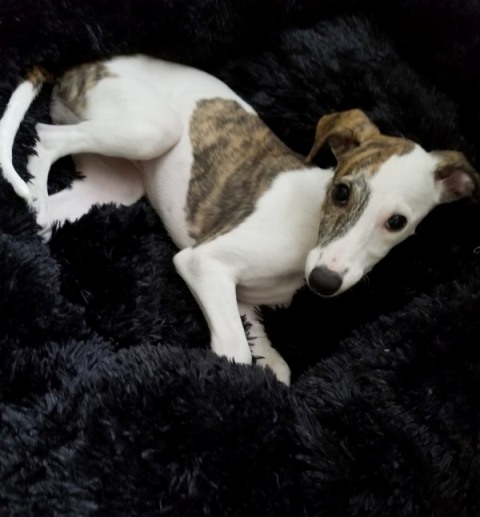
The new puppy. Her name is Dolley Madison, and she’s a 12 week old Whippet.
Other things we talk about in this episode:
Recovering a Dropped Cast-On Stitch
Top down raglan patterns/tutorials:
Wonderful Woolly Sweater
Cropped Raglan Cardi
Easy Toddler Pullover
Zasio Sweater Coat
Learn to Knit a Men’s Sweater
Learn to Knit a Woman’s Tshirt


Hi,
Here are a few tips to wind a hank.
I used to work in a wool shop and had to wind dozens a day : the secret is to prepare your hank well before the opération.
First be carefull when you open the hank not to mix everything.
Put the hank around your arms and give it 3 or 4 brisk tugs : this makes all the loops the same length and removes all the little tangles
Then check that no “knitting thread” goes over the knotted thread(s) that holds the hank together (there can be one or up to 3 of those) . If that isn’t so, put the loops in the right place and give again some tugs.
Then put the hank on the swift : hold the hank with one hand, put it around the swift, tense the hank, open the swift in a way that the hank is very tight at this stage.
Check again that there is no suspect U-turn in the yarn
You then can release slightly the tension of the swift.
Then cut the knots.
To wind, you want to use the thread that come from the outside of the hank. Unwind a little bit to be shure you chose the right thread.
Wool (even fluffy thing like mohair) usually bahave well during the process, but you want to be extra carefull with un-elastic and slippery yarn like coton or silk or viscose. For those better have the hank a bit too tense than a bit to loose. You might have to reajust the tension of the hank during the operation.
If you use a ball winder, the position of the swift and the winder are also important.
First, it is better to stand, you have a better grip of everything.
Let’ s assume you are right-handed.
When you stand in front of the winder you want the swift on your left. If you have a table, you can put the winder on one side and the swift on the perpendicular one.
It is also easier if the thread you are holding comes from the left of the swift (the swift turns anti-clockwise when you are winding).
When you wind, you hold the thread with your left hand somewhere between the swift and the winder for 2 reasons. Your left arm is streched away from you and you use it like a pulley to change the direction of the thread. The aim is to avoid the thread forming a right angle on the “metalic wire loop thing” of the winder : the thread has to come straight through it or with a small angle.
You also want to give some tension to the thread with your left hand by pinching your fingers together. Try to find the good tension : if too tense, it’s hard to wind. If too loose, the thread can get tangled on the winder. It is different according of the nature of the yarn.
It is not easy at first but with time you will find the good position, it depends of your size, length of arms, position of the swift and winder …
(if you are left handed, mirror everything, the swift turns clockwise).
An other gold rule : if things still get tangled during the process: NEVER remove the hank from the swift, untangle directly on the swift (or you risk ending with a giant messy knotty nightmare on the table).
Hope this makes sense (not easy to write this very visual instruction in a foreign langage !) and will help.
Emilie (France)
Beautiful colors and impressive in size!